So You Ran Over Your Sprinkler Head
Posted on July 31, 2014
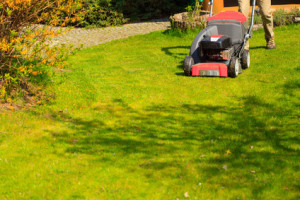
Gardening. Mowing green lawn with red lawnmower in spring day.
So you’ve run over your sprinkler head with your lawn mower and broke it. Now what??
Not to worry…one of our most common repair requests is a broken sprinkler head, and during the summer months this request increases as the amount of yard work increases. There are a couple of options, you can either tackle the repair yourself or have a licensed professional fix it for you.
If you hire a sprinkler person to fix the broken head, be sure that they are licensed with the Texas Commission on Environmental Quality (TCEQ). The TCEQ regulates this industry, and if it’s not the homeowner working on their own system, the rule is that anyone repairing any system other than their own must be licensed. This helps to protect the homeowner. Now, if the situation is that your landscaping guys broke a head, most will say that they can fix the sprinkler head, but only a few are actually licensed to do the repair. If you don’t know, just ask. We’re all required to carry our licensing card with us while on a job.
Hiring a professional to repair a sprinkler head is not an expensive repair, in fact, it’s one of our cheapest repairs. We have a one hour minimum for a service call, and most sprinkler heads can easily be replaced within that hour. Keep in mind that it may take a bit longer if the sprinkler head is surrounded by tree roots or in an area that is difficult to access.
If the sprinkler head can’t be repaired before your next watering day, you can still use your sprinkler system, but water will definitely be running down the street or pooling in your yard or flowerbed. This will use extra water and likely cost more money on your water bill as the water will be flowing unopposed. Depending on where in the zone the broken head is, it may also cause some of the other sprinkler heads to not get enough water to spray how they are supposed to spray.
Basic steps to fix it yourself…
- Determine which sprinkler head and nozzle to buy. You don’t necessarily need to replace the sprinkler head with one made by the same manufacturer, but you do need to make sure it’s the same height, size, spray radius, etc. This information can be found on the top of the sprinkler head, but if it’s too damaged, take a look at another sprinkler head in your yard with the same spray pattern.
- Dig out the broken sprinkler head. Use a shovel to cut about one foot around the sprinkler head. Be very careful to dig slowly and not too deep. Digging aggressively or too deeply could damage the piping…making more work for you! Once you’ve cut around the sprinkler head, remove the sod layer, lifting it straight up. Then use a hand trowel to scoop out the dirt around the sprinkler head – scoop out enough so that you can get both hands around the head.
- Unscrew the old sprinkler head. Turning counterclockwise, unscrew the sprinkler head. Be careful that dirt doesn’t drop into the connection once you’ve taken the head off. If dirt does get in, flush it out by letting water run through it until it’s clear.
- Screw on the new sprinkler head. Once the connection is clear of dirt, screw on the new sprinkler head. Check for leaks before replacing the dirt and sod.
- Set the nozzle. Lift the cap and grasp the stem carefully with your fingers. Thread the nozzle onto the stem and screw it into place. Test it to make sure the water is spraying the right way. If not, adjust the nozzle.
Leave a Reply
You must be logged in to post a comment.
There are no comments on this entry.