What to Do If a Sprinkler Head Won’t Go Down?
Posted on April 28, 2014
Sprinkle on green grass garden
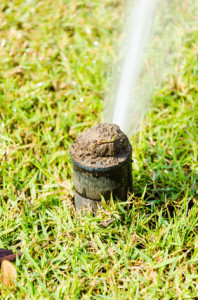
So today is your watering day. You have set your sprinkler system to run during the nighttime hours because you know that is best. You wake up in the morning wondering if the sprinkler system worked. You look outside and yup, it worked, fewf! How did you know it worked? Was it the water droplets on your grass? The wet look of the walkway? Nope and nope. It was because the sprinkler heads were still sticking up!
When your sprinkler heads (one, several or all) stay up and won’t go down after a specific zone is finished watering or after the sprinkler system has turned off, something isn’t working properly. No need to worry…it’s typically a quick and easy fix!
Leaving a sprinkler head in the up position runs the risk of the sprinkler head being broken by a lawnmower, car, child, or toy. When this happens, it quickly turns into a job requiring more physical labor – digging up the sprinkler head and replacing it.
Pop-up sprinkler heads are designed to do just that, pop up. When the valve is electronically opened by the controller in your garage, water rushes through the valve and piping, like water through a gate and tunnels. This water pressure is what causes the sprinkler heads to pop up above the ground and grass and spray the water. When the water stops, the sprinkler heads are supposed to retract nicely and smoothly back into the ground, but sometimes the sprinkler heads can get stuck.
The Most Common Reason for Relatively NEW Sprinkler Heads to not go down is that there is dirt or debris caught inside the sprinkler head. Dirt, grass clippings, leaf pieces, and small rocks can become lodged in the small space between the pop-up nozzle and the body of the sprinkler.
How to clean out a sprinkler head yourself…
- Unscrew the cover from the sprinkler head. Remove the nozzle and spring assembly from the body of the sprinkler head.
- Clean any debris from the inside of the sprinkler body or on the nozzle mechanism. Rinse the components with water and wipe them down with a rag.
- Turn the water on to the station controlling the sprinkler head. This will force out any dirt or debris that may be the cause of repeated sticking after reassembly.
- Reinsert the spring and nozzle mechanism back into the sprinkler head. Screw the cover back onto the sprinkler to secure the nozzle.
The Most Common Reason for OLDER Sprinkler Heads to not go down is that they are just simply worn out. As we get older, there are things that we just can’t do as we did when we were younger. Same goes with sprinkler heads. If after cleaning the sprinkler head it still does not go down on its own, it’s time to replace the sprinkler head. This is a slightly more complicated process than the cleaning.
How to change a sprinkler head yourself…
- Cut through the lawn surrounding the sprinkler head, about six inches all the way around. Do this very carefully and slowly so as not to break the water line.
- Pry up the section of grass using a hand trowel or small shovel and set aside to replace later.
- Carefully dig away the dirt surrounding the sprinkler head. Set the dirt in a pile nearby to use to refill the hole later. Dig down carefully until you reach the water supply pipe.
- Once you have cleared all the way down to the riser (a short vertical pipe connected to the water supply pipe), unscrew the old sprinkler body and remove it. Don’t let dirt fall in to the opening.
- Obtain a replacement sprinkler head.
- Wrap a thin coating of Teflon tape around the threaded male end of the riser. Screw in the new sprinkler body until it is hand-tight.
- Turn on the sprinkler line for just a moment to blow out any dirt that may have fallen into the line.
- Turn off the sprinklers, then using the flush-plug ring, pull up the riser, unscrew the flush-plug, put in the plastic filter screen and screw on the nozzle.
- Twist the nozzle to align the spray pattern so it sprays onto the lawn, not the sidewalk, road or walkway.
- Replace the dirt back into the hole, packing it down around the sprinkler body.
- Replace the turf and push it down around the sprinkler head.
- Turn on the sprinklers to check that everything is spraying correctly.
Please keep in mind that if at any point you do not feel comfortable cleaning or replacing a sprinkler head, please do not hesitate to contact a licensed professional for help. We would be more than happy to help you!
Leave a Reply
You must be logged in to post a comment.
There are no comments on this entry.